Prerequisites
- A CometAPI account with an active API key — get yours here
- A BuildShip account — sign in here
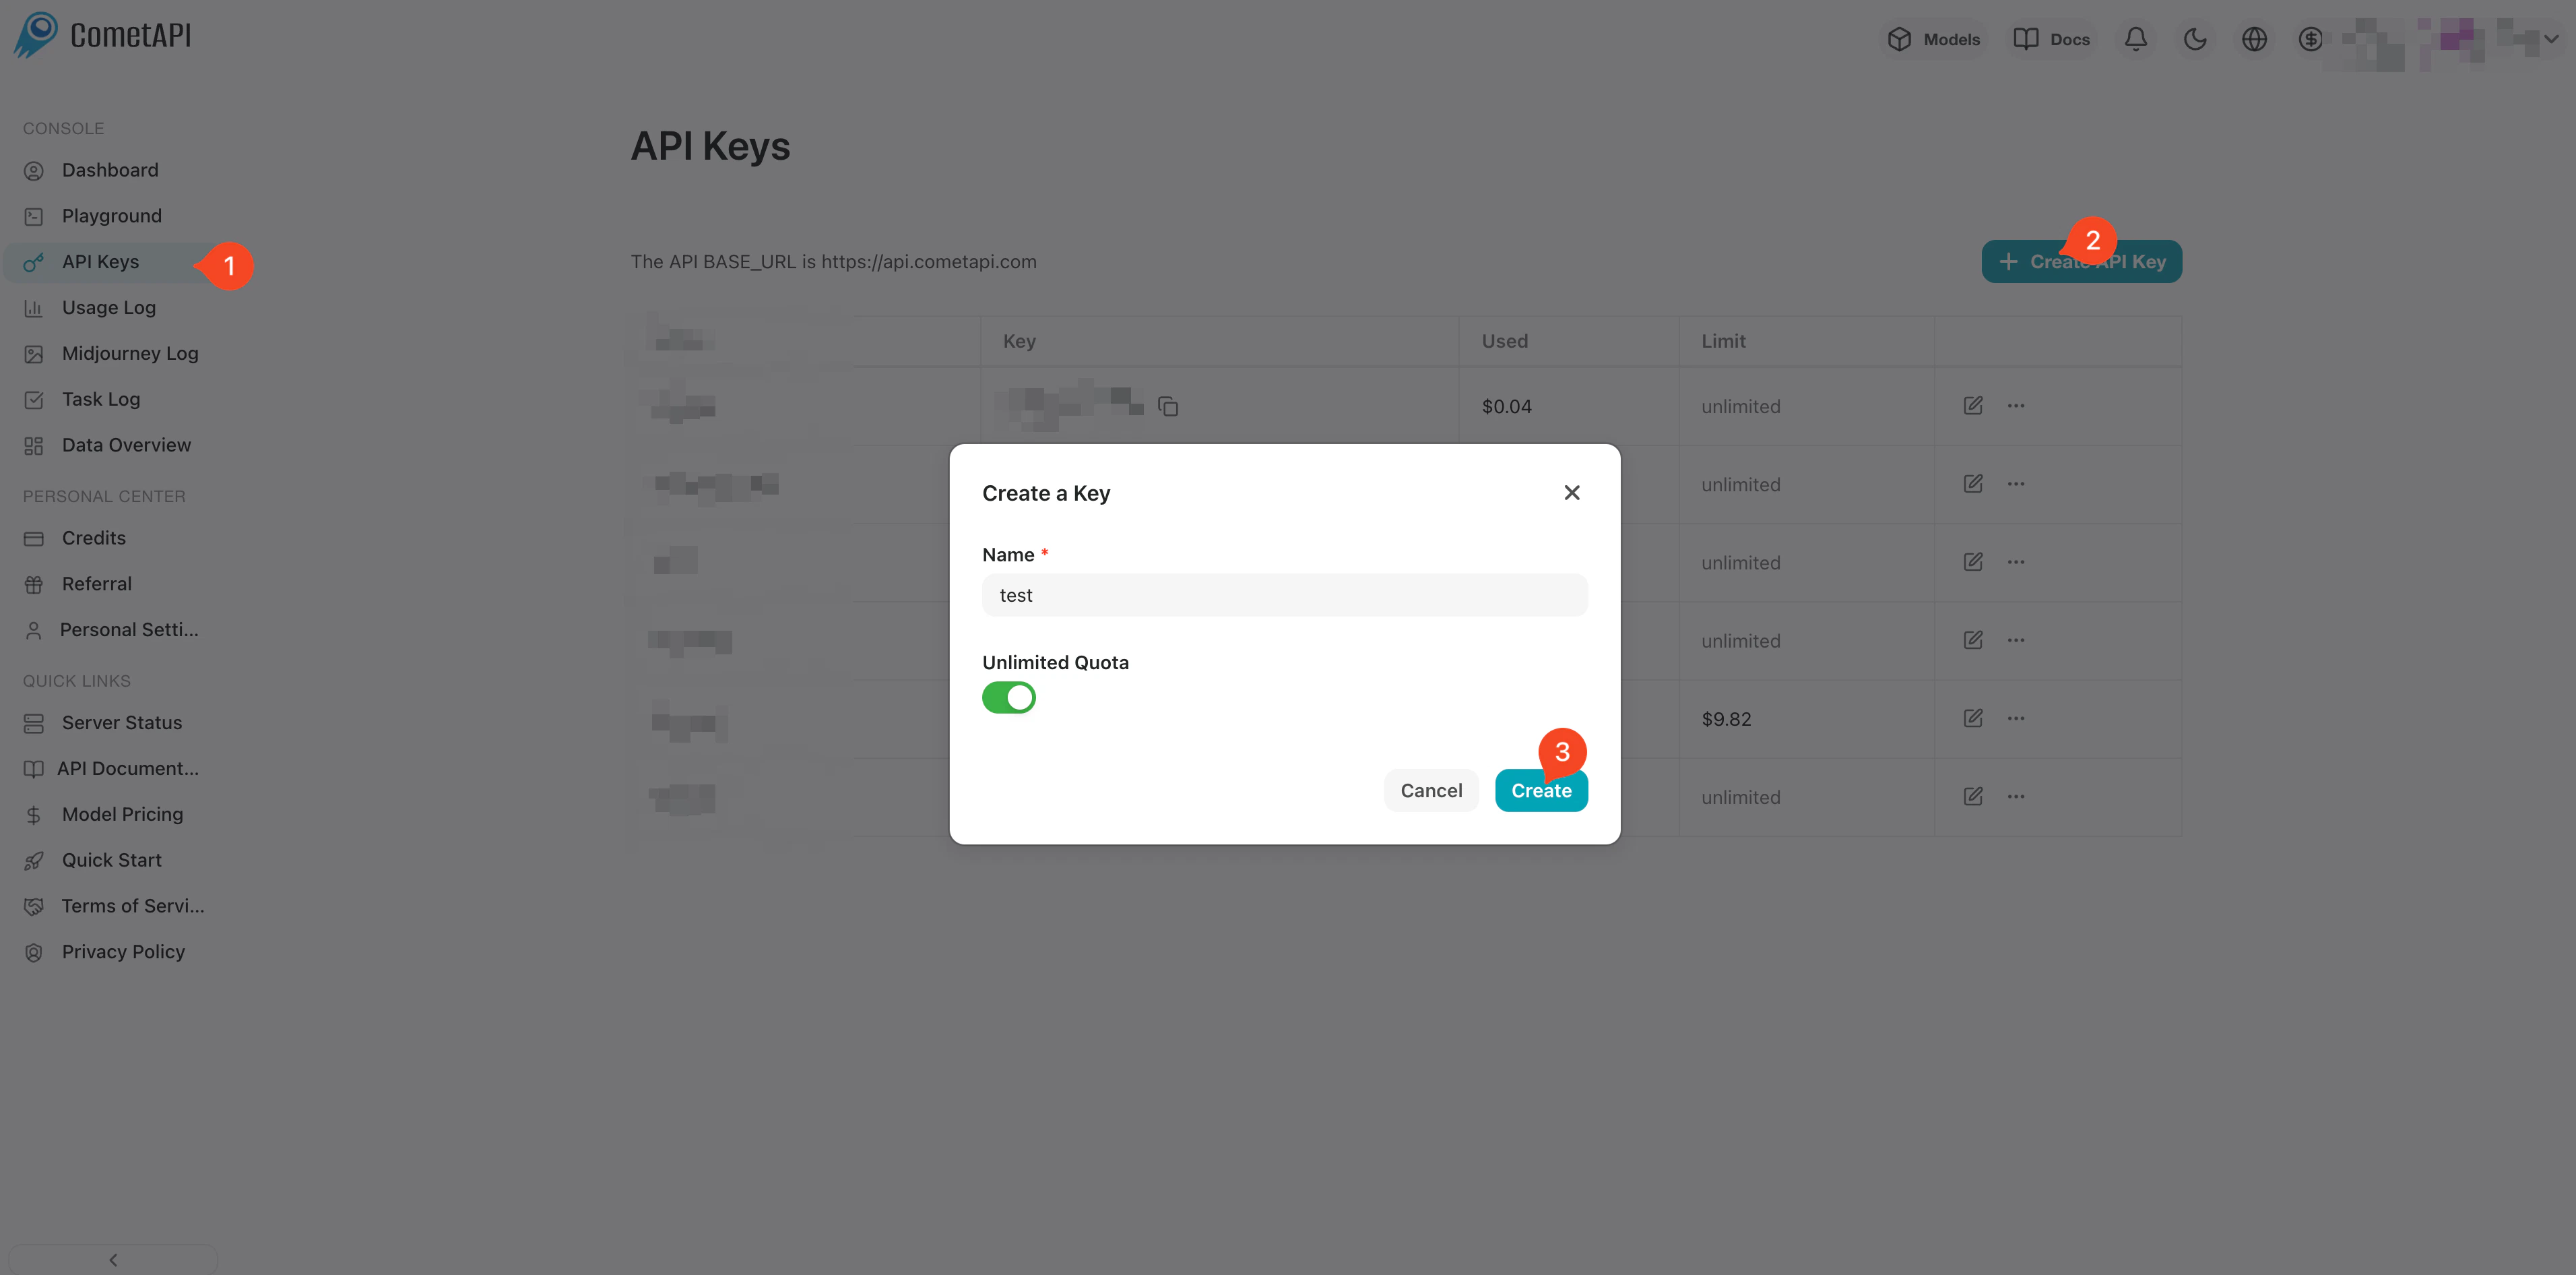
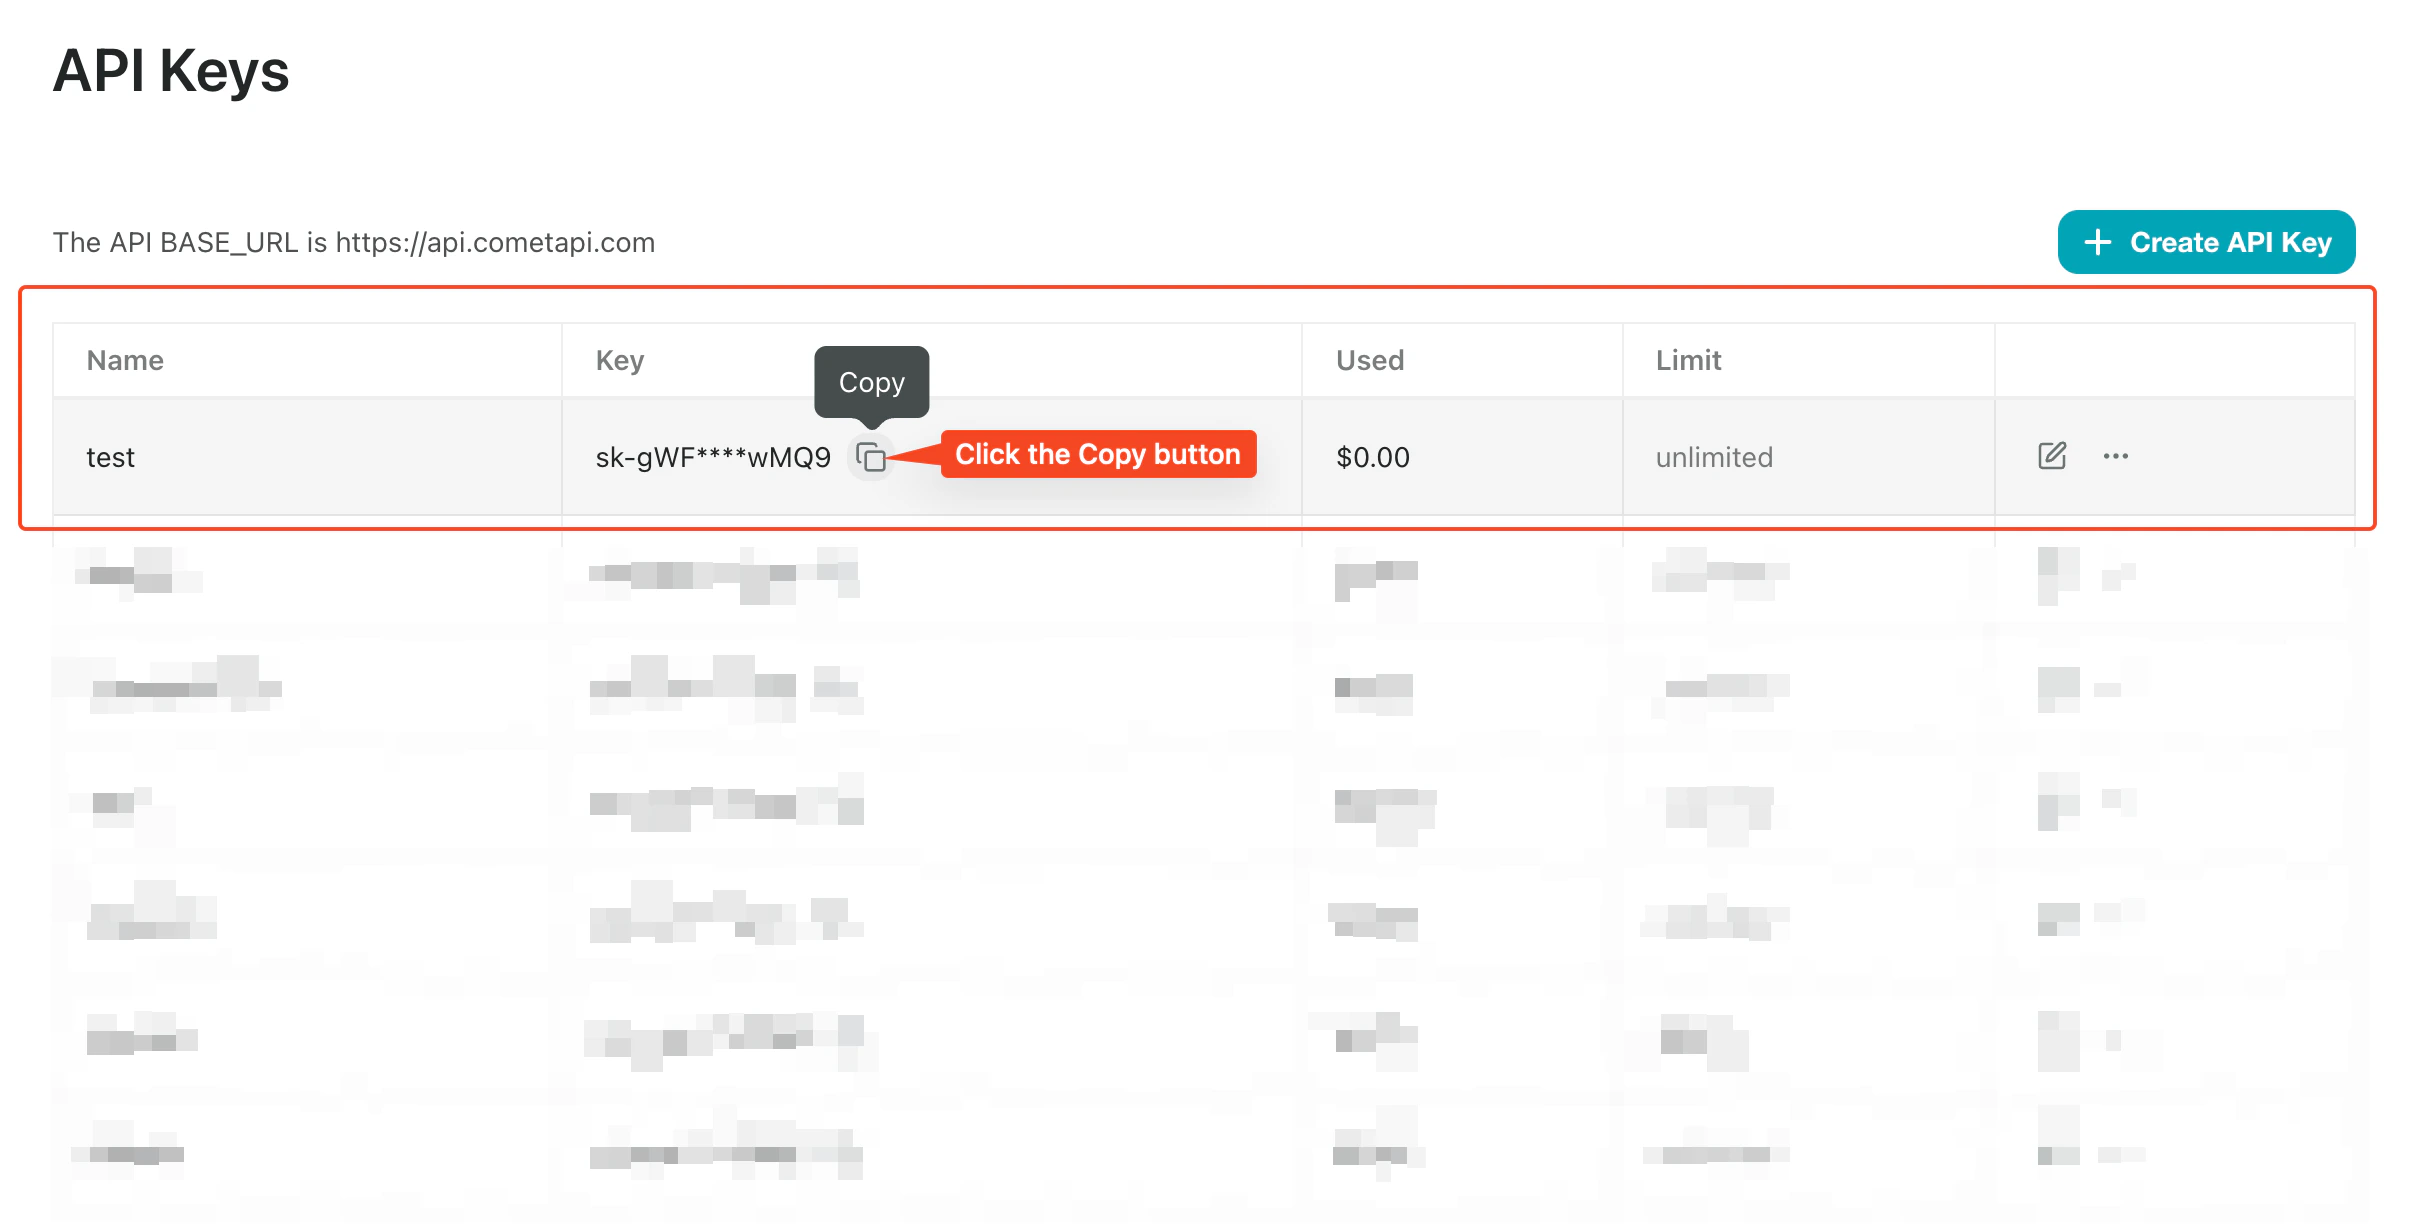
Get your CometAPI API key
Create a workflow with a REST API trigger
- In the BuildShip dashboard, click Create a new workflow → From Scratch.
- On the canvas, click Add Trigger and select REST API. This generates a callable endpoint for the workflow.
Add the CometAPI Text Generator node
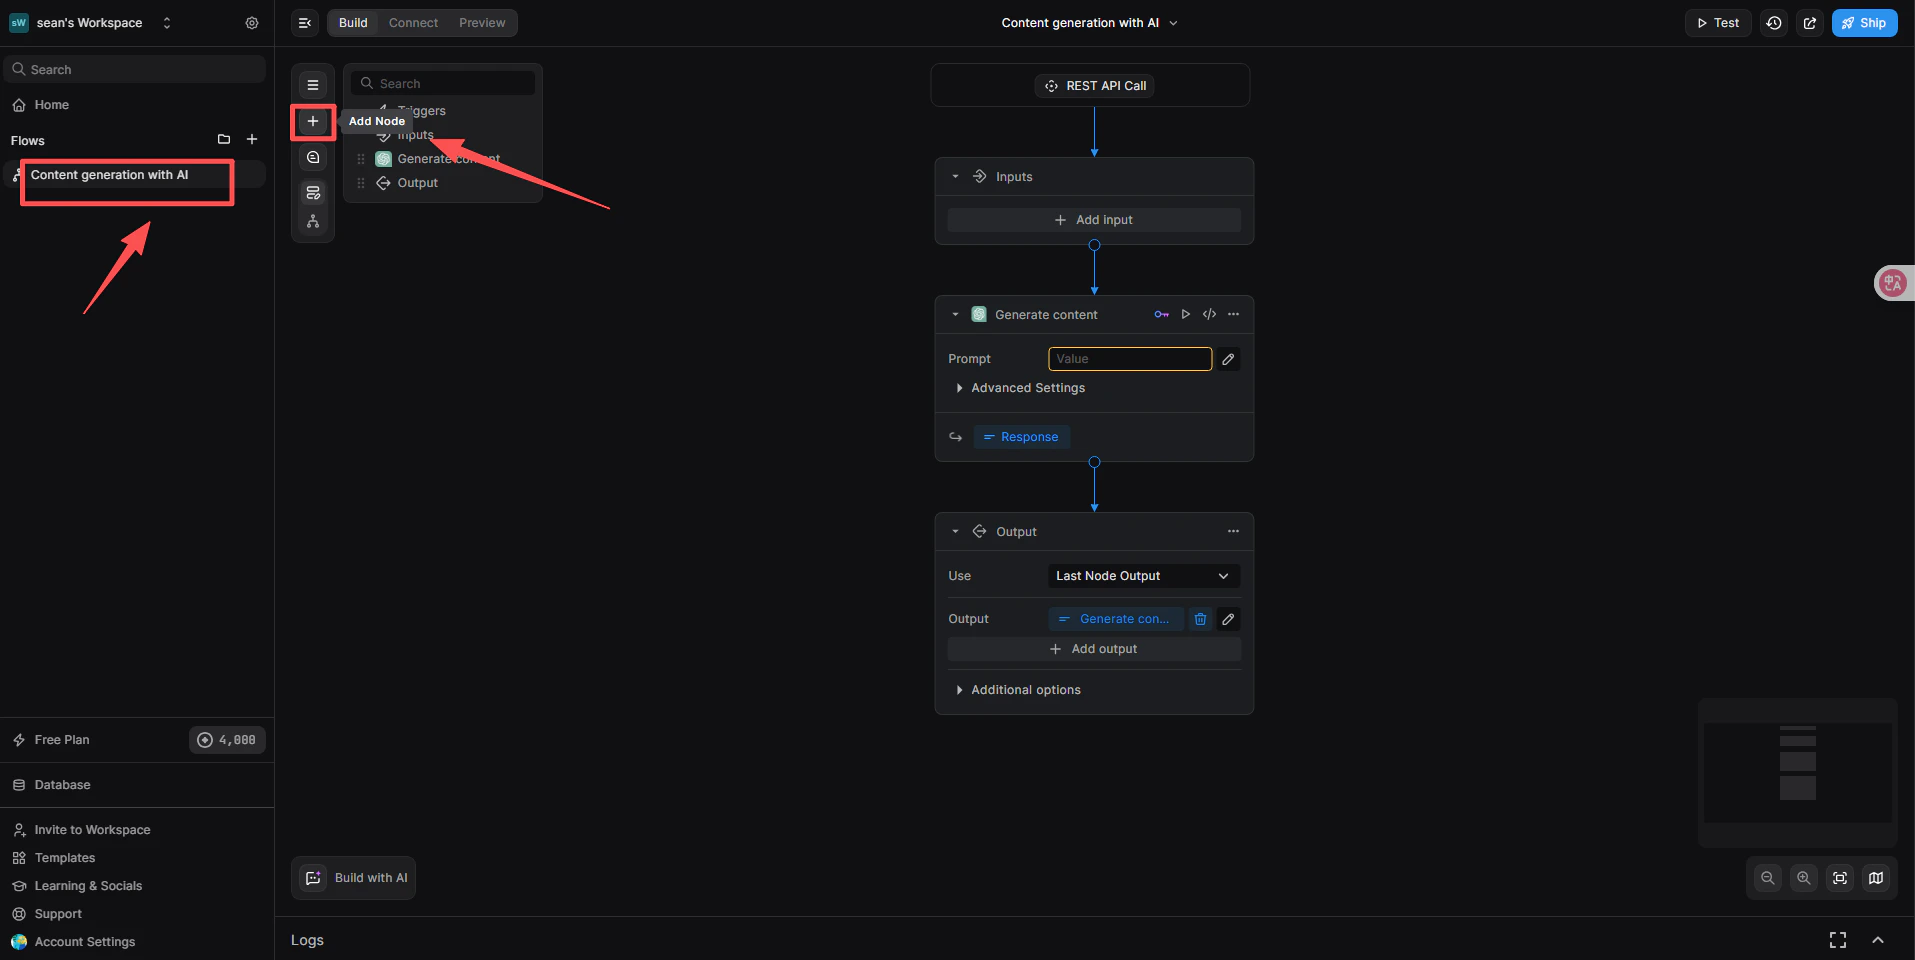
- Below the REST API trigger, click + Add a new step.
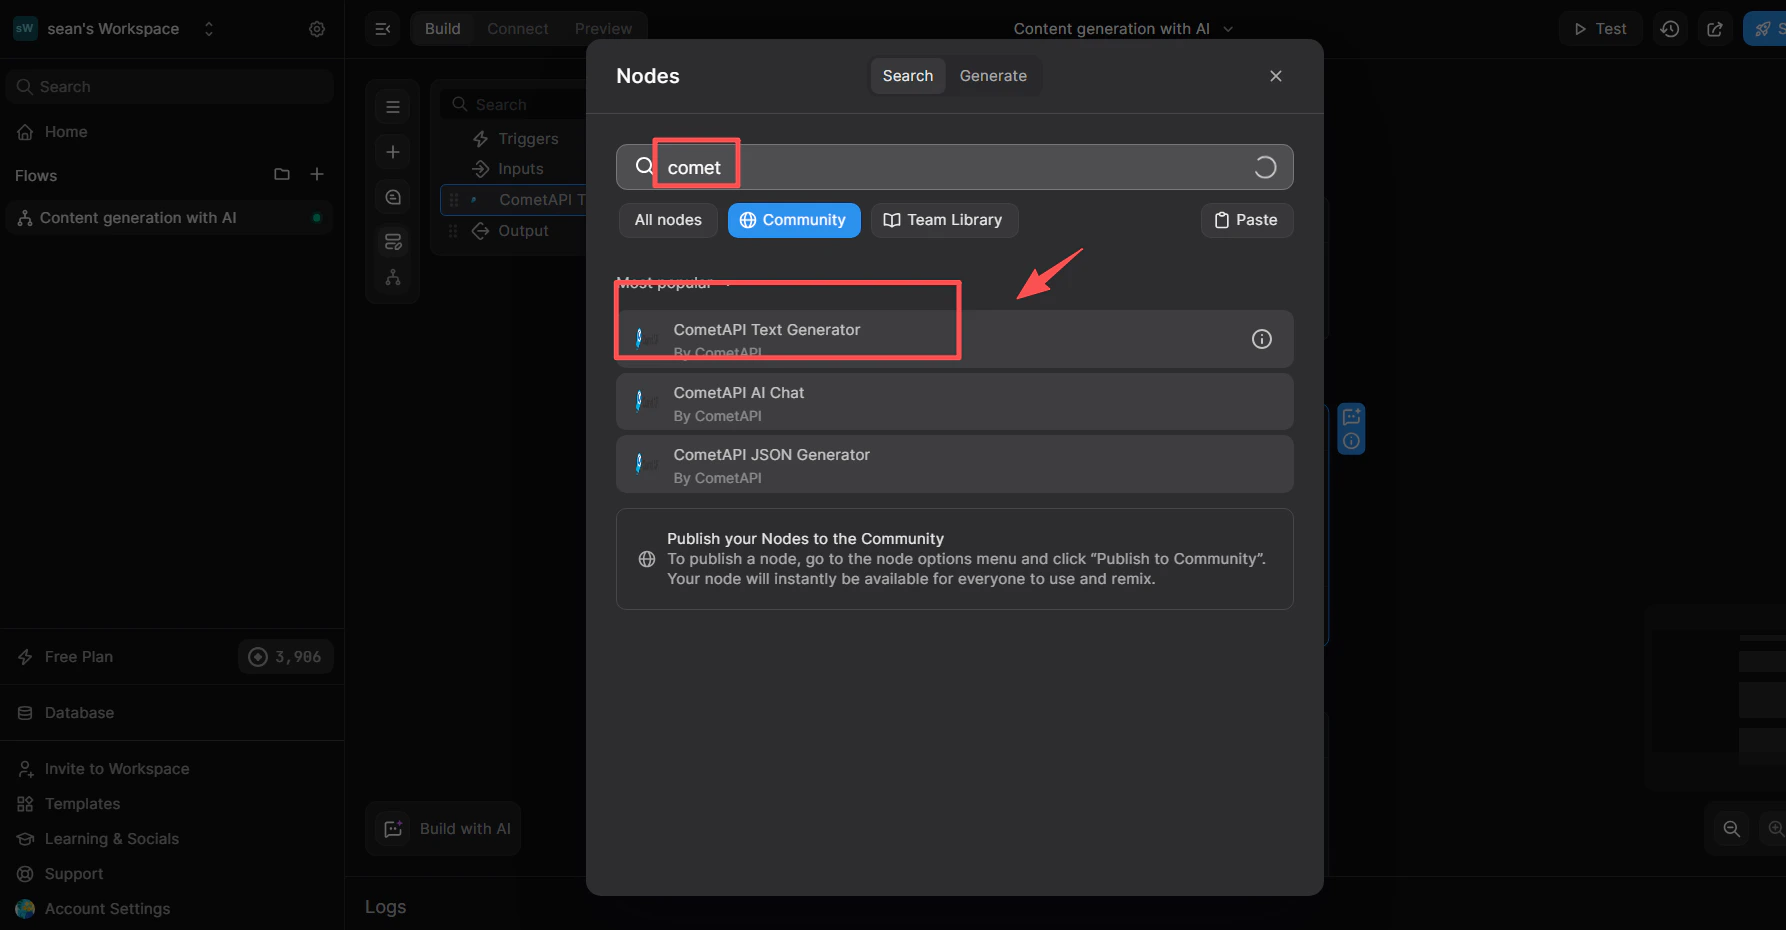
- In the node library search box, type
cometapi. - From the Community list, select CometAPI Text Generator.
Link the CometAPI integration
This step tells the node which key management system to use.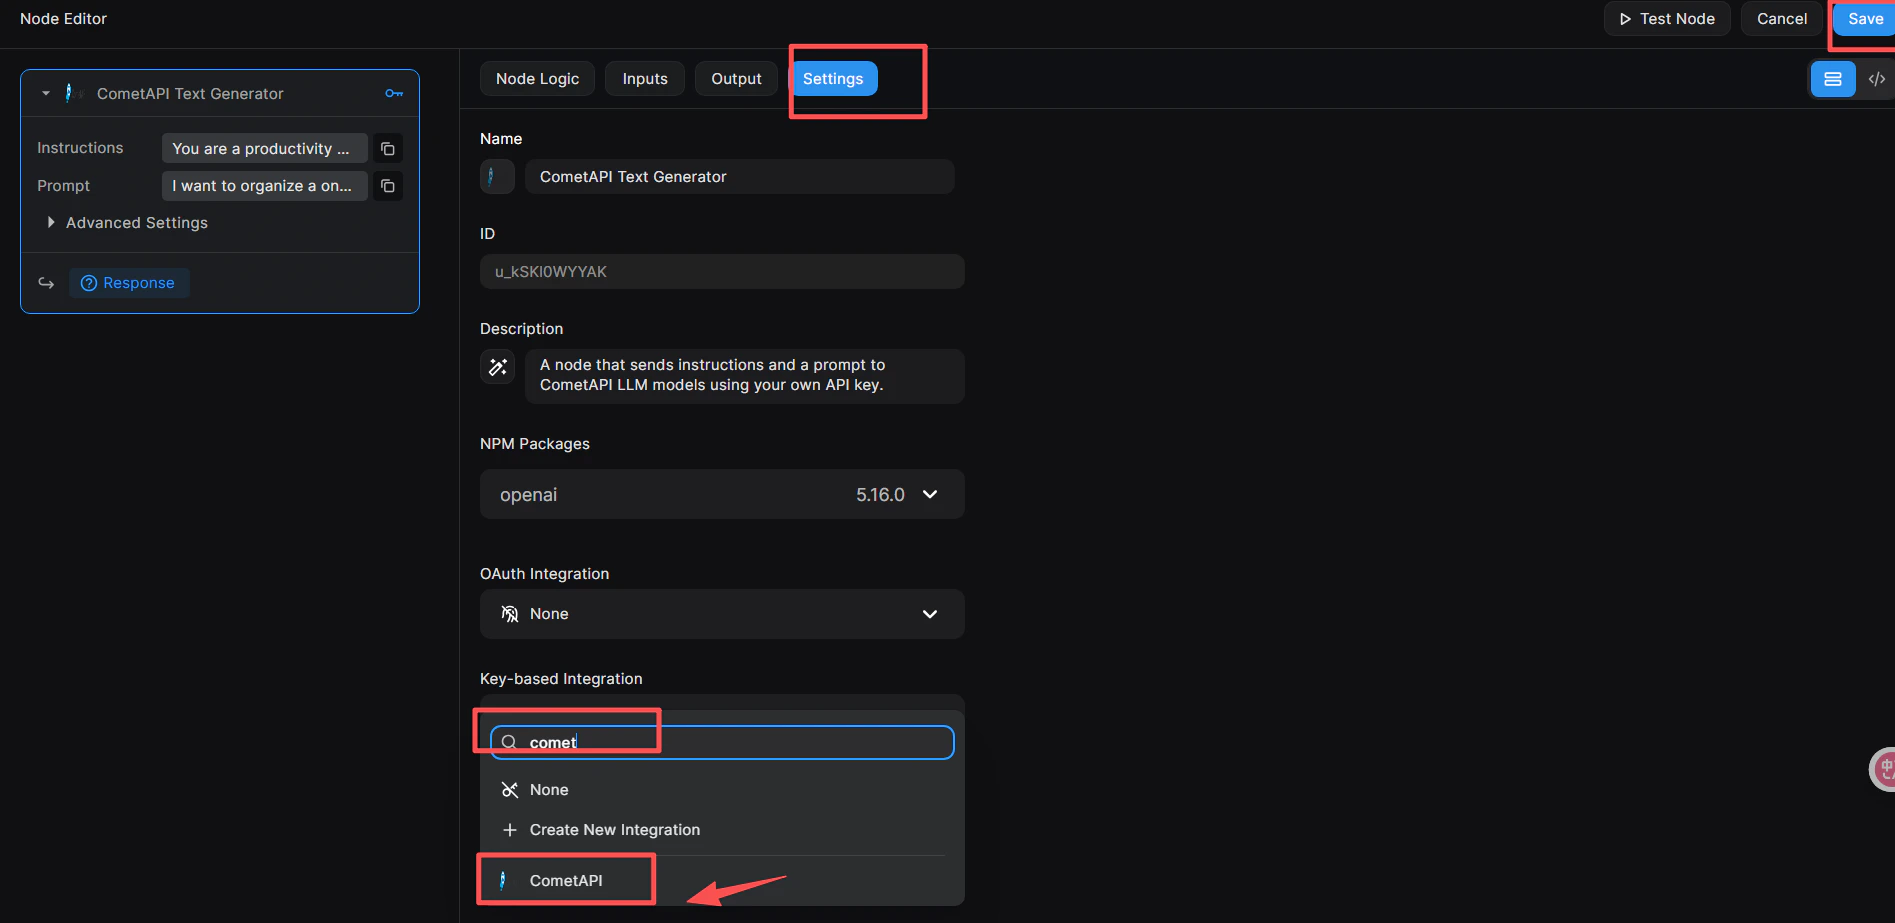
- Click the node to open the Node Editor on the right.
- Switch to the Settings tab.
- In Key-based Integration, open the dropdown and select CometAPI.
- Click the blue Save button in the top-right corner.
Add your API key to the node
- In the Node Editor, switch to the Inputs tab (or click directly on the node).
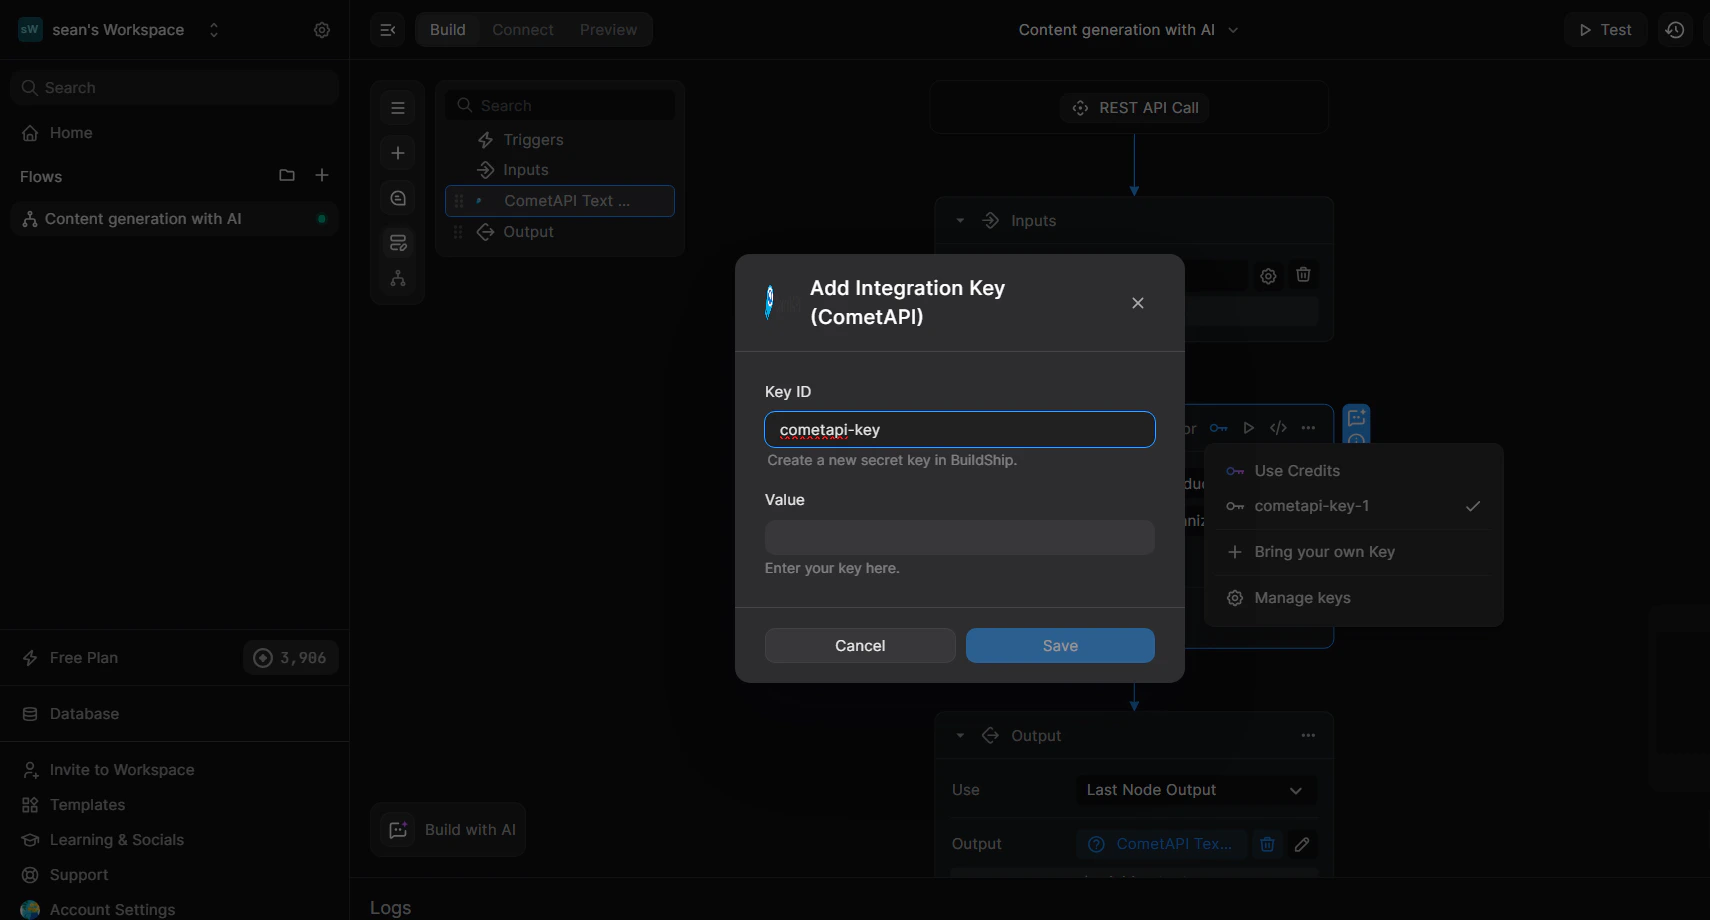
- Click the 🔑 key icon in the node’s top-right corner to open the key dropdown.
- Select + Bring your own Key.
- Enter a Key ID (e.g.
cometapi-key-1) and paste yoursk-xxxxxkey in Value. - Click Save.

Configure input parameters
In the node’s Inputs tab: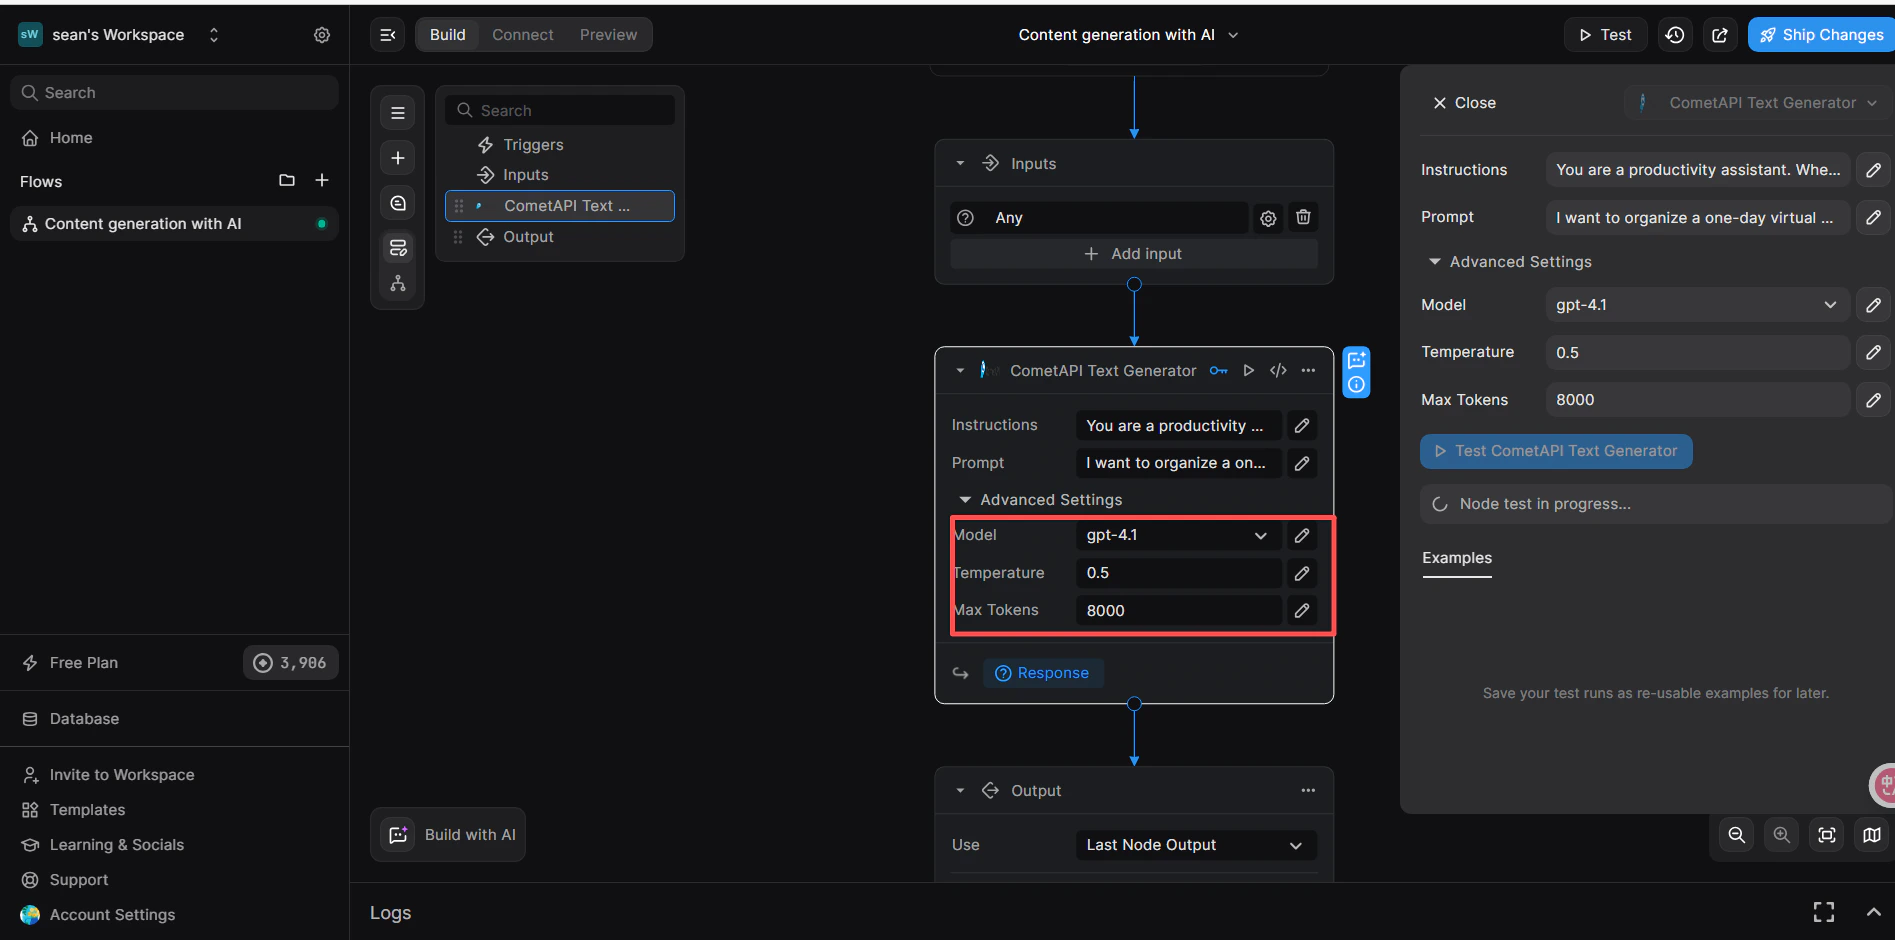
- Instructions (optional): set a system role, e.g.
You are a productivity assistant. - Prompt: click the
</>icon, then select Trigger → Body → prompt to map the incoming request body. - Advanced → Model: enter the current model ID you want to use.
Add a Return Response node and test
- Below the CometAPI node, click + Add a new step and select Return Response.
- In the Body field, click
</>and select theresponsevariable from the CometAPI Text Generator node. - Click Test in the upper-right corner, select JSON input format, and send:
- A successful response in the Result panel confirms the workflow is working.
